

A flavorful rice dish made with tender chicken, aromatic basmati rice, green chillies, aromatic spices, fresh coriander, and fried onions. This dish is inspired by the spicy Andhra cuisine of Vijayawada in India.
The spice level is balanced with the use of yogurt and ghee (clarified butter), along with whole spices, and saffron milk gives it aroma and color. An optional step is charcoal-smoking the biryani for a subtle smoky flavor.
As a chef, I can tell you there is more to a good biryani than the amount of spices used in its preparation. The chicken needs to be marinated for sufficient time to absorb all the flavors, and the rice needs to be cooked to perfection before being layered with the chicken and then steamed at a controlled temperature to complete the biryani.
This is a Vijayawada-style chicken biryani made with 500 g of chicken and 300 g of basmati rice. It serves 4 people and is perfect for a weekend family meal, dinner party, or just for those who love to make spicy Indian biryani at home. It is a truly unmatched recipe.
What Makes Vijayawada Chicken Biryani Different?
Vijayawada is a city in the state of Andhra Pradesh in India, known for its unique use of chillies and seasoning in its food. This Andhra-style chicken biryani is very spicy, but you can control the level of heat as you prepare it.
This recipe combines the spicy and pungent Vijayawada chicken biryani with the layered technique of making any other biryani.
The main elements are
Marinated chicken: Yogurt, ginger-garlic paste, green chillies, and powdered spices are used to marinate the chicken before cooking it.
The long-grain Basmati rice can be used for the biryani. It needs to be soaked, parboiled, and drained well before adding to the biryani.
Fried onions: These add sweetness, savory depth, and texture.
Whole spices: Cinnamon, cardamom, cloves, star anise, and bay leaves contribute aroma.
Saffron milk and ghee: These add fragrance and richness during the final cooking stage.
Optional charcoal smoke: A short, controlled smoking of the rice can impart a wonderful smoky aroma without overpowering the other flavors of the biryani.
There is no fixed recipe for Vijayawada chicken biryani. As with most biryanis, the spice level and preparation method can vary. This is a home-style version of the recipe.
Ingredients for Vijayawada Chicken Biryani
- 500 g chicken (with or without bone) and 300 g basmati rice for four portions.
- For the chicken marinade
- 500 g chicken, bone-in or boneless
- 2 medium tomatoes, chopped
- 200 g plain yogurt
- 1 tablespoon ginger-garlic paste
- 2 green chillies,
- finely chopped or crushed
- 1 tablespoon cumin-coriander powder
- 1/2 tablespoon red chili powder,
- adjusted to taste
- 1/2 bunch fresh coriander, chopped
- Salt to taste
- Prepared biryani masala, as described below
- For the rice
- 300 g basmati rice
- Water for soaking and boiling
- Salt to taste
- 2 star anise
- 5 cloves
- 1 small cinnamon stick
- 2 green cardamom pods
- 2 bay leaves
- 1/2 tablespoon peppercorns
- 1 tablespoon ghee, taken from the measured quantity below
For layering and finishing
- 4 medium onions, thinly sliced
- 3 tablespoons ghee or butter in total, including the amount used for the rice
- 2 tablespoons oil
- 1 pinch saffron
- 1/4 cup warm milk
- Remaining chopped fresh coriander
- Reserved fried onions
For the homemade biryani masala
- 1 tablespoon coriander seeds
- 1/2 tablespoon cumin seeds
- 1/2 tablespoon caraway seeds
- 2 black cardamom pods
- 1 piece mace
- 1/2 tablespoon peppercorns
- 3 bay leaves
- 1/2 tablespoon turmeric powder
- Salt to taste
Note on ingredients: The amount of biryani masala is as specified in the original recipe. Here, turmeric and salt are best used as seasoning, rather than being ground up with the other spices. Add salt in small quantities and then adjust the total seasoning to your taste. The homemade masala may be too much for this batch, so use it in small quantities as required.
How to Make Vijayawada Chicken Biryani
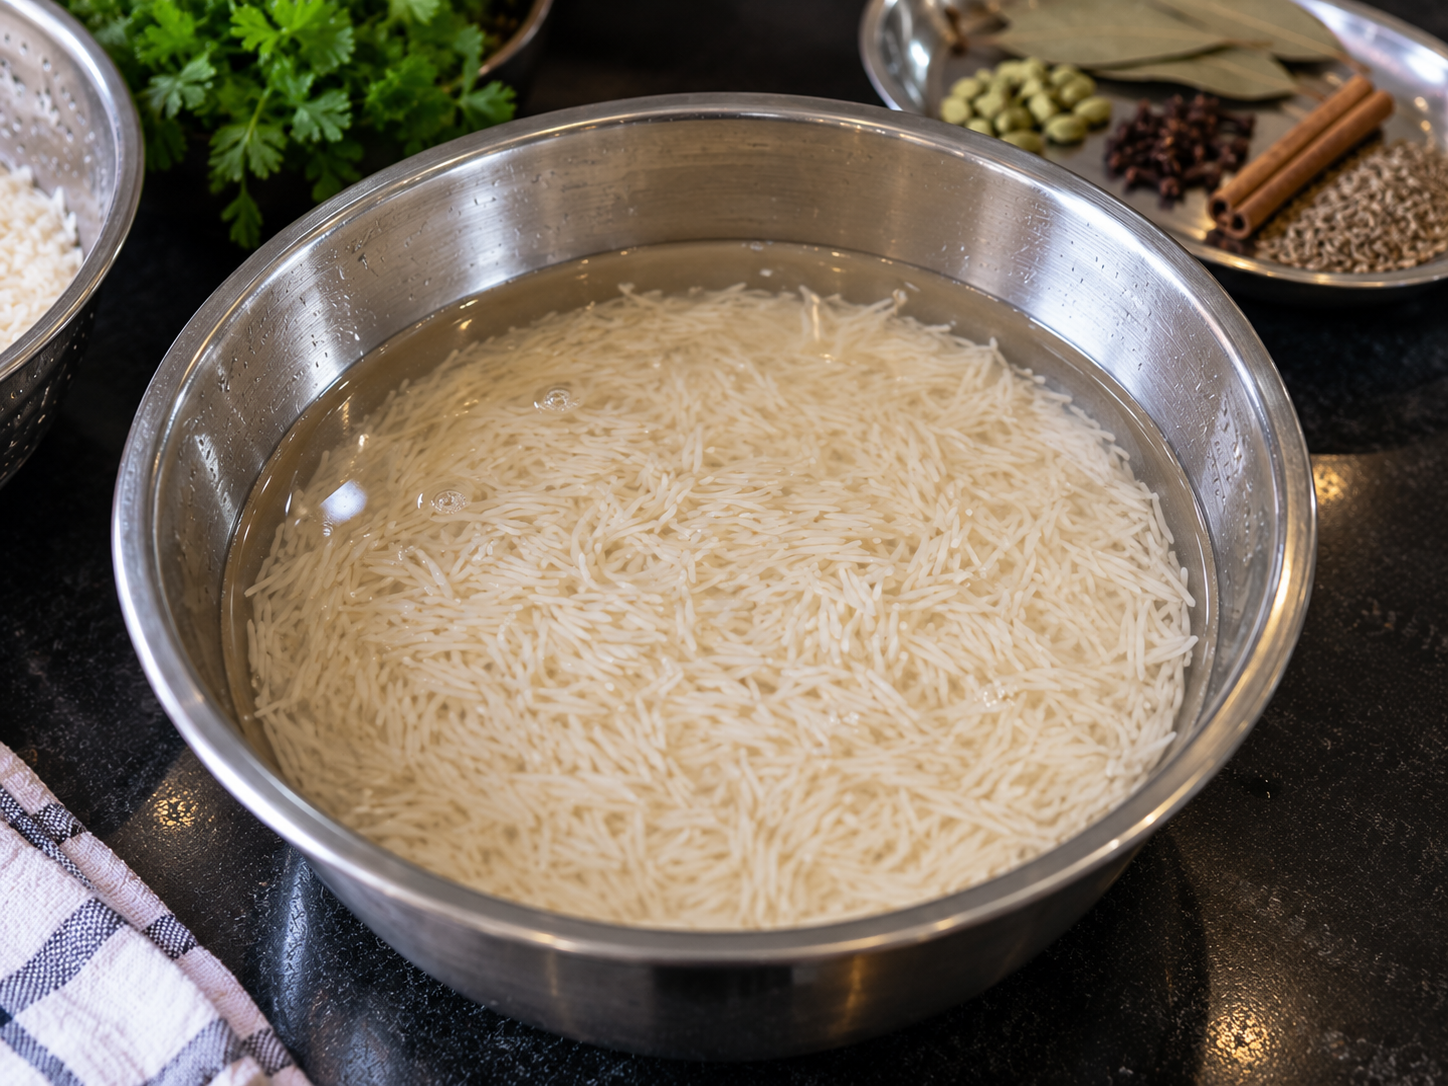
Step 1: Wash and soak the basmati rice.
Rinse the basmati rice gently in several changes of water until the water becomes clearer. Soak it for 15 to 20 minutes, then drain.
Soaking helps the grains hydrate more evenly. Avoid soaking for too long, as the rice can become more fragile during boiling and layering.
Step 2: Prepare the biryani masala.
Lightly toast the coriander seeds, cumin seeds, caraway seeds, black cardamom, mace, peppercorns, and bay leaves in a dry pan over low heat until aromatic.
Let the spices cool before grinding them into a powder. Keep the turmeric and salt separate for easier seasoning control.
Use the amount needed to season the chicken and store any remaining dry spice mix in an airtight container.
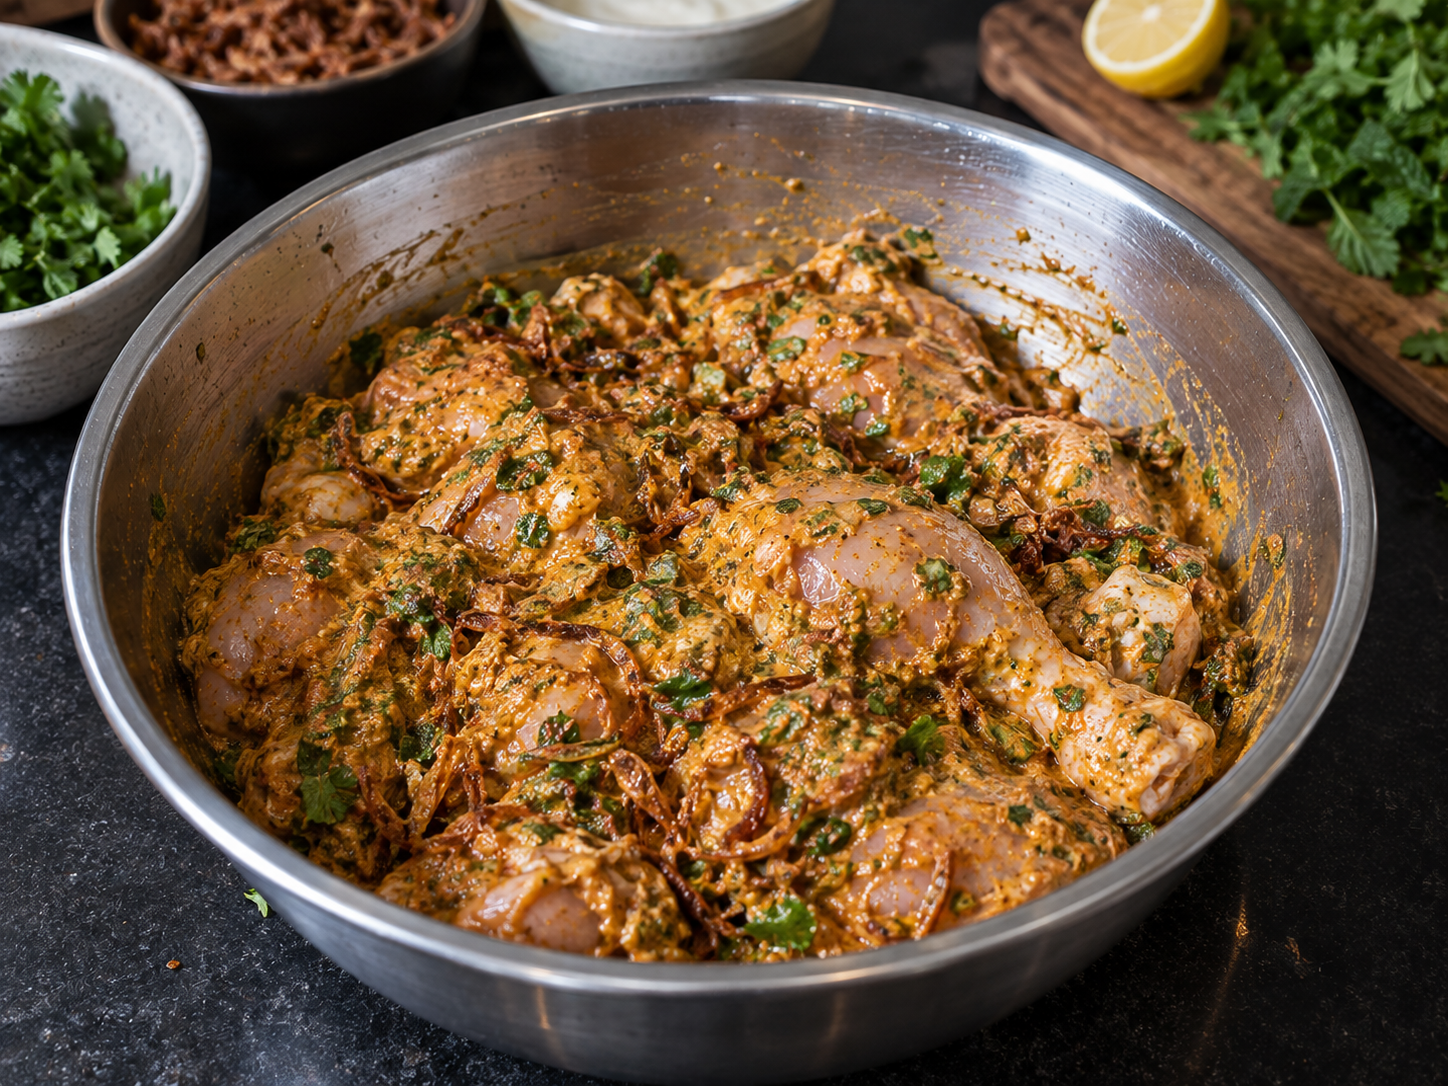
Step 3: Marinate the chicken.
Mix the chicken pieces with the ginger-garlic paste, green chillies, biryani masala, cumin-coriander powder, red chilli powder, turmeric, chopped tomatoes, some fresh coriander, and salt.
Mix thoroughly so the chicken is coated evenly. Marinate for at least an hour in the refrigerator.
Raw chicken should be kept in the refrigerator while it marinates and must not be used as a finishing sauce if it has not been thoroughly cooked.
Step 4: Fry the onions.
Thinly slice the onions and fry them in oil on medium heat until golden brown. Stir occasionally as the onions cook and remove from the pan when they are golden brown and starting to crisp up.
The residual heat from the pan will continue to cook the onions and turn them darker. Drain on a plate or rack and reserve some of the onions for layering the biryani.
Take care not to allow the onions to burn, as this will impart a bitter taste to the dish.
Step 5: Finish the chicken marinade.
Combine the marinated chicken with yogurt and some of the fried onions. Mix well to combine. The yogurt brings some tanginess and body to the chicken.
The acidity can affect the texture of the chicken, but overall the chicken will still be very tender, as long as it is the right cut, cooked for long enough, and on low heat.
Keep the marinated chicken in the refrigerator until you are ready to use it for the dish.
Step 6: Prepare the saffron milk
Heat the milk to slightly above body temperature but not boiling.
Add the saffron to the milk and let it steep for several minutes while you prepare the remaining ingredients.
The milk will absorb some of the color and flavor of the saffron. This can be poured over the rice in the biryani dish as you layer the chicken and rice.
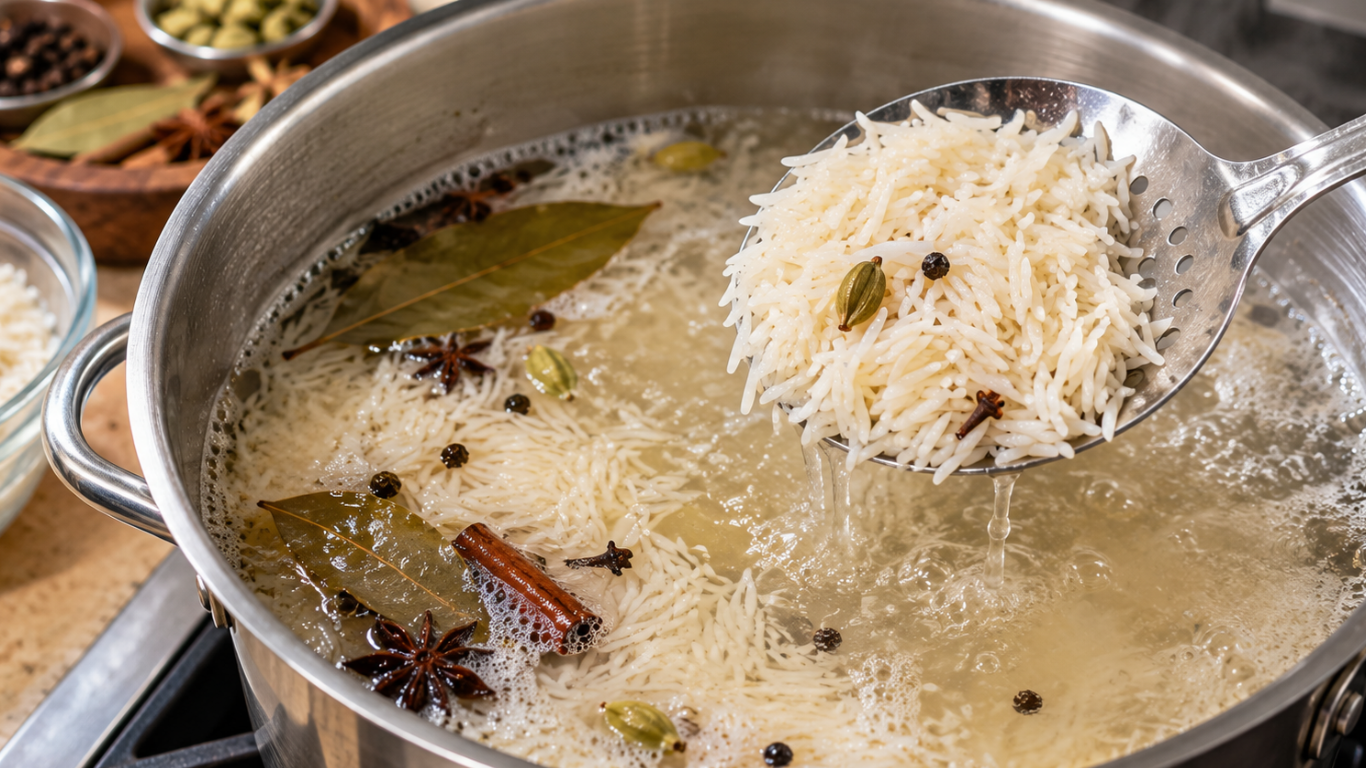
Step 7: Parboil the rice.
Bring a large pot of water to a boil with whole spices, salt, and some of the measured ghee. Parboil the rice until almost cooked but with the core still firm.
Begin testing for doneness after 12-15 minutes and continue testing until done. Drain the rice once it is cooked enough to be partially cooked but with the center still firm. This will cook further in the final stage of the biryani.
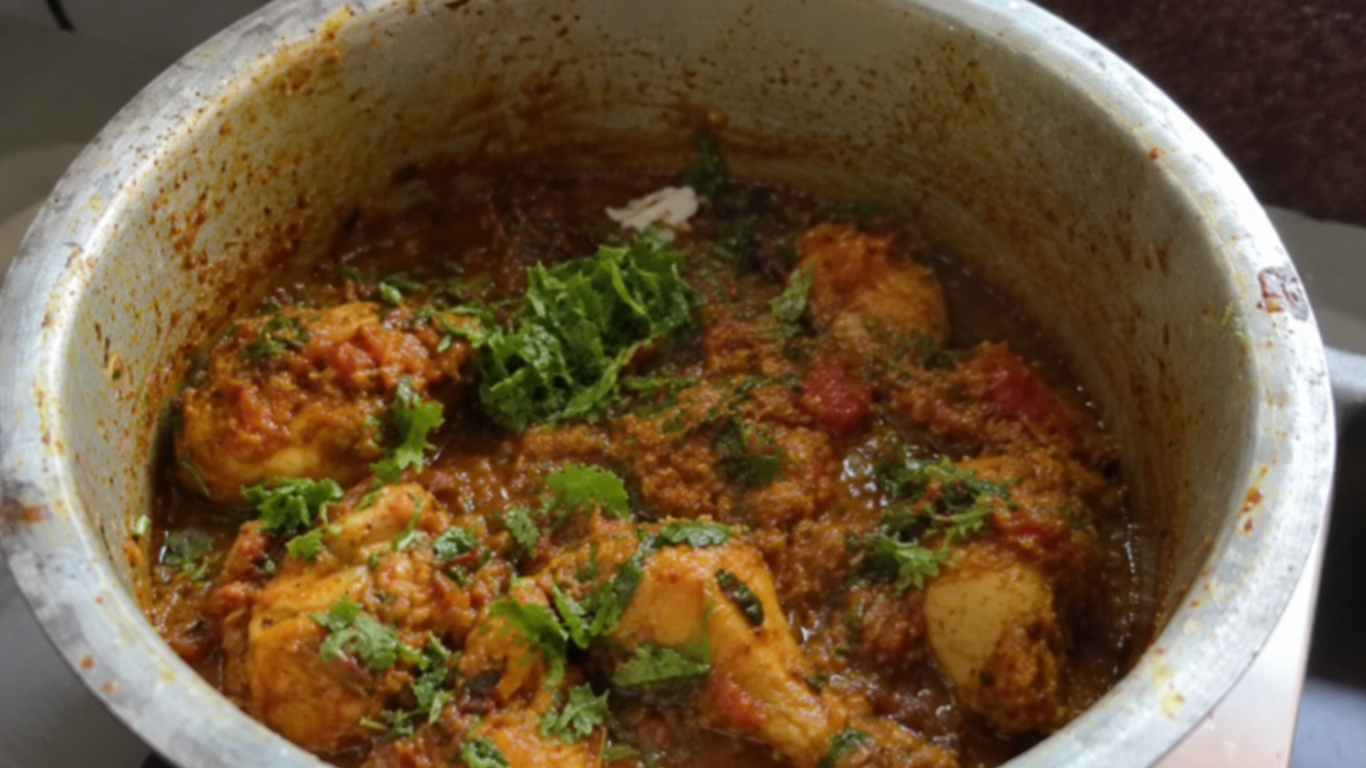
Step 8: Cook the chicken.
Heat oil and some of the measured ghee in a heavy-bottomed pan. Add marinated chicken pieces and cook until the chicken exterior is no longer raw and the masala starts to cook down.
The chicken will be almost cooked by the time the masala has cooked down. Stir from time to time to prevent the yogurt and spices from sticking to the bottom of the pot. The cooking time of chicken varies depending on the size of the pieces and the type of chicken used.
Do not attempt to cook the chicken on too high a heat, as the masala could burn before the chicken is cooked through.
Step 9: Layer the biryani.
Scatter some of the partially cooked rice over the chicken, then some of the fried onions and some of the fresh coriander. Pour saffron milk over the top of the rice and then the remaining ghee.
There is no need to mix the rice and chicken at this stage. By not mixing, the aromas can develop, and the finished dish will look so much better.
Step 10: Seal and cook on low heat.
Cover the pot with a well-fitting lid. If the lid does not fit well enough, use a suitable dough seal around the rim of the pot, keeping the dough away from the food.
Cook on low heat, covered, until the rice is tender, the chicken is cooked, and flavors have married together. A heat diffuser can be used if cooking on direct flame to help prevent scorching.
Note: This stage can take up to 20 minutes, but time will vary depending on the pot, heat, rice, and chicken. Check for doneness of the chicken. Remember to measure the thickest part of the chicken using a food thermometer to ensure it has reached an internal temperature of 165°F (74°C). If the chicken pieces are of varying sizes, test several of them.
Step 11: Rest before serving
Leave covered on low heat for 5 minutes. Lift the lid off carefully to allow any trapped steam to escape. Lift the rice and chicken out of the pot with a wide spoon. Garnish with the reserved fried onions and fresh coriander. Serve with raita, sliced onions, lemon wedges, or a simple salad.
Chef RBS Tips for Better Chicken Biryani
Do not overcook the rice before layering. If the rice is fully cooked, it will become mushy and can even break when layered over hot chicken.
Add green chillies and red chili powder in the required proportions. Their flavors are distinct and must be used in the right quantity to get desired results.
The heavy-bottomed pot distributes heat more evenly and thus helps to prevent the masala from burning during the final cooking stage.
Fry the onions carefully. Golden onions bring sweet and salty flavors to the biryani. Dark, burnt onions will make the dish bitter.
Season the dish in stages. Rice water, chicken marinade, and the masala for the biryani all need salt. Taste each of these components where possible and then add the remainder of the salt.
Always check the internal temperature of the chicken with a meat thermometer. Color is not a reliable indicator that chicken has reached a safe temperature to eat. For poultry, the USDA recommends an internal temperature of 165°F (74°C).
Optional Charcoal-Smoked Flavour
This is an optional addition to the recipe for Biryani which imparts a very distinct charcoal-smoked flavor. This is not essential for making Biryani but can enhance the overall experience.
If using charcoal, use food-safe metal containers and handle hot coals with appropriate heat-resistant tools. Keep coals away from flammable materials and do not use burning coals in an enclosed space, as they release carbon monoxide.
For a simple homemade biryani, you can leave out the charcoal and rely on the toasted spices, fried onions, and ghee for the aroma of the Biryani.
Common Vijayawada Chicken Biryani Problems
Why did my biryani rice turn mushy?
This can happen if the rice has been overcooked during the boiling stage, has been left to soak for too long, or has had too much liquid added during the final steaming stage. It is best to drain the rice as soon as it is still slightly firm in the center.
Why is my chicken biryani too spicy?
This could be due to the type of chilli used and also the number of green chillies added. Reduce the amount of red chilli powder and green chillies in the next batch of biryani and still get a great flavor.
Why did the biryani burn at the bottom?
The biryani could have burnt at the bottom if the flame was too high, the pot was made of thin material, or the chicken masala was too dry. Use a thick-bottomed pot and reduce the heat while cooking on dum. Also, check if the chicken mixture has burnt before adding rice to the pot.
Can I use boneless chicken?
Yes, boneless chicken can be used in the Vijayawada Chicken Biryani. However, because it cooks faster than on-the-bone chicken, you may have to adjust the initial cooking time for the chicken in the recipe and check the thickest part of each piece of chicken with a food thermometer to ensure it reaches 165°F (74°C).
Can I prepare the biryani ahead of time?
Pre-prep the spice mix, slice the onions, and measure out the ingredients for the biryani in advance. Keep raw chicken in the fridge and away from any ready-to-eat foods. Prepare the biryani as close to when you are going to eat it as possible to ensure the rice is at its best.
How to Store and Reheat Leftover Biryani
Refrigerate leftovers promptly and store in shallow containers. Keep in the refrigerator for 2 hours or less.
Refrigerated leftovers should be used within 3 to 4 days for best quality. Reheat thoroughly to 165°F (74°C). Use a food thermometer to check temperature in several places. If the rice has dried out, add a small amount of water before reheating.
Do not leave cooked rice or chicken biryani out at room temperature for any length of time.
Frequently Asked Questions
What is Vijayawada chicken biryani?
Vijayawada chicken biryani is a chicken and rice dish, which is strongly flavored with spices from Andhra Pradesh. It is made with marinated chicken, basmati rice, whole spices, fried onions, saffron milk,k and optionally smoked on charcoal.
What makes this recipe spicy?
The heat in this recipe comes from the green chillies, red chilli powder, black pepper,er and the spice mix that you make. This will vary in strength, so adjust accordingly.
Can I use store-bought biryani masala?
Yes, a store-bought biryani masala can be used to make this dish. However, please read the instructions on the packet and adjust the salt and chilli powder accordingly, as the strength and salt content of different brands of biryani masala vary.
Why is the rice cooked only partially before layering?
The rice is only partially cooked before layering in the pot, as it finishes cooking during the steaming process, ensuring that the grains do not overcook and become mushy.
Is charcoal necessary for this recipe?
No. The chicken biryani can still be very aromatic even without smoking with charcoal. The whole spices, fried onions, saffron,n and ghee will impart a lot of aroma to the dish.
How do I know when the chicken biryani is safe to eat?
Chicken needs to reach an internal temperature of 165°F (74°C) using a food thermometer. Measure the thickest part of the chicken, even if it is a mix of sizes or on the bone.
Final Thoughts
The Vijayawada style of chicken biryani consists of spice, aroma, tender pieces of chicken,en and well-cooked rice. Each step in preparing this biryani is crucial – the marination is done to develop flavors, rice is par-boiled in water and then steamed on low heat to cook the rest of the ingredients in the biryani.
This is a complete recipe with precise measurements, followed by cooking instructions to prepare a meal for four people with the rich, Andhra-inspired flavors of the biryani.
What I have learned from my biryani experience is that it is not just the use of strong spices but also balance, timing, and heat control to allow the flavors to come together.
Recipe by Chef Rahul Sonawane (Chef RBS).


Vijayawada Chicken Biryani Recipe | Authentic Andhra Style
Description
Flavorful rice dish made with tender chicken, aromatic basmati rice, green chillies, aromatic spices, fresh coriander, and fried onions. This dish is inspired by the spicy Andhra cuisine of Vijayawada in India.
The spice level is balanced with the use of yogurt and ghee (clarified butter) along with whole spices, and saffron milk gives it aroma and color. An optional step is charcoal-smoking the biryani for a subtle smoky flavor.
As a chef, I can tell you there is more to a good biryani than the amount of spices used in its preparation. The chicken needs to be marinated for sufficient time to absorb all the flavors, and the rice needs to be cooked to perfection before being layered with the chicken and then steamed at a controlled temperature to complete the biryani.
This is a Vijayawada-style chicken biryani made with 500 g of chicken and 300 g of basmati rice. It serves 4 people and is perfect for a weekend family meal, dinner party, or just for those who love to make spicy Indian biryani at home.
Ingredients
Biryani Masala
Layering
Instructions
-
Step 1: Wash and soak the basmati rice
Rinse the basmati rice gently in several changes of water until the water becomes clearer. Soak it for 15 to 20 minutes, then drain.
Soaking helps the grains hydrate more evenly. Avoid soaking for too long, as the rice can become more fragile during boiling and layering.
-
Step 2: Prepare the biryani masala
Lightly toast the coriander seeds, cumin seeds, caraway seeds, black cardamom, mace, peppercorns, and bay leaves in a dry pan over low heat until aromatic.
Let the spices cool before grinding them into a powder. Keep the turmeric and salt separate for easier seasoning control.
Use the amount needed to season the chicken and store any remaining dry spice mix in an airtight container.

-
Step 3: Marinate the chicken
Mix the chicken pieces with the ginger-garlic paste, green chillies, biryani masala, cumin-coriander powder, red chilli powder, turmeric, chopped tomatoes, some fresh coriander, and salt.
Mix thoroughly so the chicken is coated evenly. Marinate for at least an hour in the refrigerator.
Raw chicken should be kept in the refrigerator while it marinates and must not be used as a finishing sauce if it has not been thoroughly cooked.
-
Step 4: Fry the onions
Thinly slice the onions and fry them in oil over medium heat until golden brown. Stir occasionally as the onions cook and remove them from the pan when they are golden brown and starting to crisp up.
The residual heat from the pan will continue to cook the onions and turn them darker. Drain on a plate or rack and reserve some of the onions for layering the biryani.
Take care not to allow the onions to burn, as this will impart a bitter taste to the dish.

-
Step 5: Finish the chicken marinade
Combine the marinated chicken with yogurt and some of the fried onions. Mix well to combine. The yogurt brings some tanginess and body to the chicken.
The acidity can affect the texture of the chicken, but overall the chicken will still be very tender, as long as it is the right cut, cooked long enough, and on low heat.
Keep the marinated chicken in the refrigerator until you are ready to use it for the dish.

-
Step 6: Prepare the saffron milk
Heat the milk to slightly above body temperature but not boiling.
Add the saffron to the milk and let it steep for several minutes while you prepare the remaining ingredients.
The milk will absorb some of the color and flavor of the saffron. This can be poured over the rice in the biryani dish as you layer the chicken and rice.

-
Step 7: Parboil the rice
Bring a large pot of water to a boil with whole spices, salt, and some of the measured ghee. Parboil the rice until almost cooked, but still firm in the center.
Begin testing for doneness after 12-15 minutes and continue testing until done. Drain the rice once it is cooked enough to be partially cooked but with the center still firm. This will cook further in the final stage of the biryani.
-
Step 8: Cook the chicken
Heat oil and some of the measured ghee in a heavy-bottomed pan. Add marinated chicken pieces and cook until the chicken exterior is no longer raw and the masala starts to cook down.
The chicken will be almost cooked by the time the masala has cooked down. Stir from time to time to prevent the yogurt and spices from sticking to the bottom of the pot. The cooking time of chicken varies depending on the size of the pieces and the type of chicken used.
Do not attempt to cook the chicken on too high heat, as the masala could burn before the chicken is cooked through.
-
Step 9: Layer the biryani
Scatter some of the partially cooked rice over the chicken, then some of the fried onions and some of the fresh coriander. Pour saffron milk over the top of the rice and then the remaining ghee.
There is no need to mix the rice and chicken at this stage. By not mixing, the aromas can develop, and the finished dish will look so much better.

-
Step 10: Seal and cook on low heat
Cover the pot with a well-fitting lid. If the lid does not fit well enough, use a suitable dough seal around the rim of the pot, keeping the dough away from the food.
Cook on low heat, covered, until the rice is tender, the chicken is cooked, and flavors have married together. A heat diffuser can be used if cooking on direct flame to help prevent scorching.
 Note: This stage can take up to 20 minutes but time will vary depending on pot, heat, rice and chicken. Check for doneness of chicken. Remember to measure the thickest part of the chicken using a food thermometer to ensure it has reached an internal temperature of 165°F (74°C). If the chicken pieces are of varying sizes, test several of them.
-
Step 11: Rest before serving
Leave covered on low heat for 5 minutes. Lift the lid off carefully to allow any trapped steam to escape. Lift the rice and chicken out of the pot with a wide spoon. Garnish with the reserved fried onions and fresh coriander. Serve with raita, sliced onions, lemon wedges, or a simple salad.

Nutrition Facts
Servings 4
- Amount Per Serving
- Calories 440kcal
- % Daily Value *
- Total Fat 15g24%
- Saturated Fat 6g30%
- Cholesterol 70mg24%
- Sodium 400mg17%
- Total Carbohydrate 50g17%
- Dietary Fiber 3g12%
- Sugars 6g
- Protein 30g60%
* Percent Daily Values are based on a 2,000 calorie diet. Your daily value may be higher or lower depending on your calorie needs.

